How To Make a Ytong Nest - Ant Keeping Tutorial
Hi guys! I hope you’re doing well!
Today we’re going to learn how to build a Ytong nest, the perfect nest choice for many ant species!
Let's get into it!
What is Ytong?
If you’re new to the hobby of ant keeping, you may be wondering: “Ytong? What’s that?” Let’s explain it really quickly!
Ytong is a particular type of aerated concrete, usually used in construction as an insulation material. It is extremely popular in ant keeping for its moisture retention properties and because it’s very easy to sculpt.
Thanks to these great properties, and also to the fact that it’s one of the cheapest materials available on the market, Ytong is the perfect choice when it comes to making DIY ant nests.
It is one of the best material choices for the majority of humidity-loving ant species, and it is the ideal option for a cheap but effective ant nest! Some of the most beginner-friendly species of ants, like Messor barbarus or Lasius niger, truly love living inside this material!
For this reason, Ytong is the perfect nesting option for beginner ant keepers who don't have a lot of money to spend on this hobby!
Now that we know what Ytong is, let's see what materials we need to make our own DIY Ytong nest!
What You Need
As you can imagine, for this project we need a block of Ytong. Ytong is a particular type of concrete, usually used in construction as an insulation material.
You can easily find this material in almost every hardware store. You can also order it online from one of the many ant keeping shops.
Choosing The Size of The Nest
The first thing we have to do is decide the dimensions of the nest we are going to build. I’ve chosen the size of a red transparent foil because I’m planning to use it as a light shield for the nest.

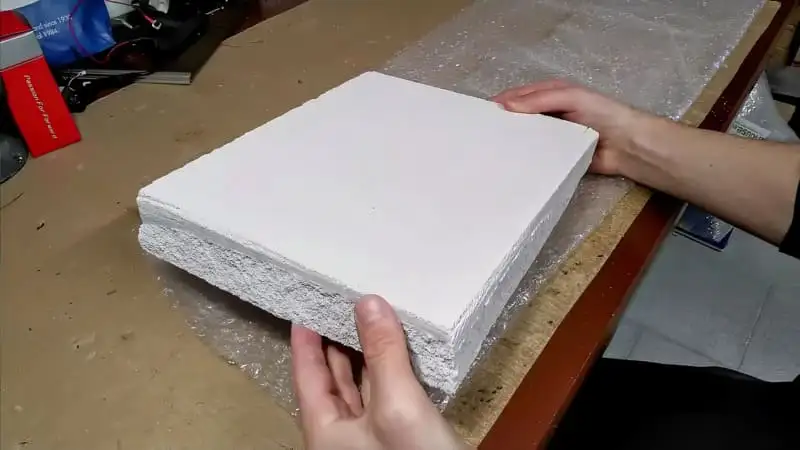
Cutting The Ytong
Once we’ve marked the Ytong with the chosen size, it’s time to remove the excess parts. We are going to do this by cutting the Ytong with a standard wood saw.
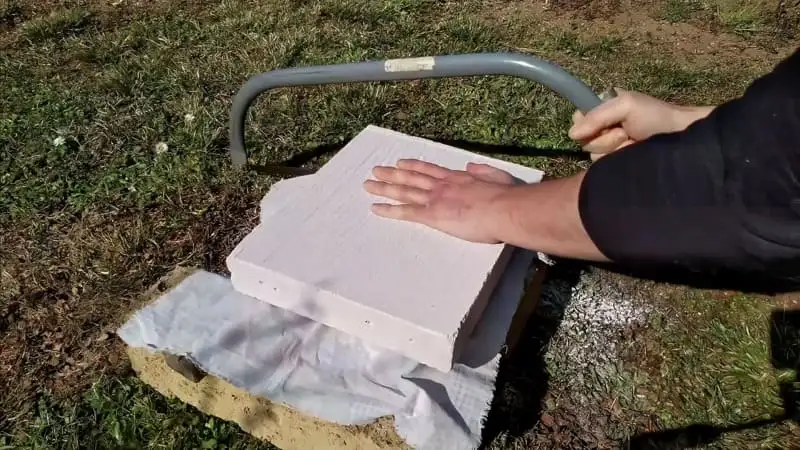
Be careful when using these types of tools! Start slow and then pick up the speed when the groove forms in the Ytong.
Don’t worry if the cuts are not extremely precise; we will adjust them later.
By the way… If you, just like me, really like these kinds of DIY projects, I’m pretty sure you’re going to love this other guide too! In this one, I explain in detail how to make another very popular type of ant nest: a wooden nest!
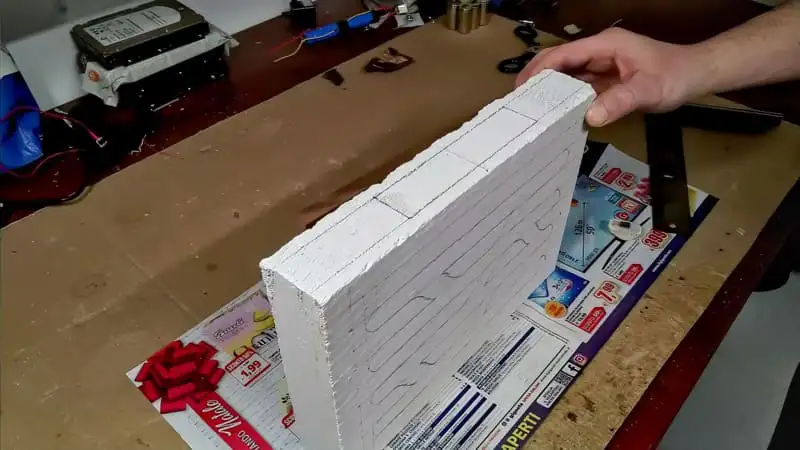
Drawing The Shape of The Nest
Now the fun part. Now we can draw the shape of the various chambers of the nest. You can do it freehand and choose a naturalistic shape, or you can make it a little more elaborate and use some drawing tools.
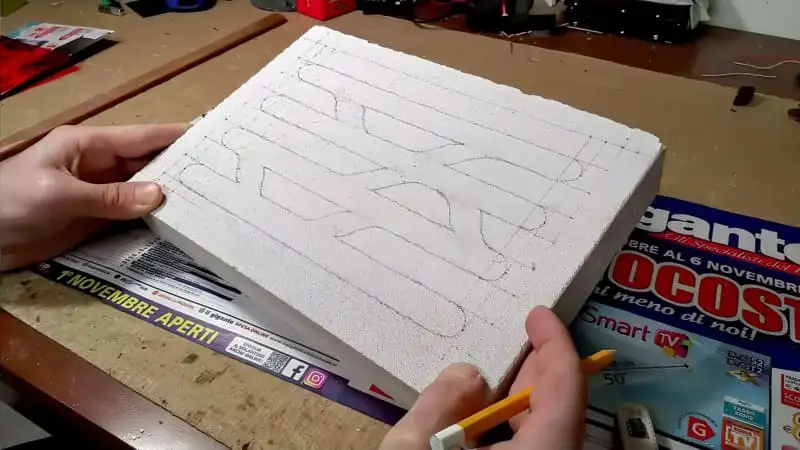
As you can see for this nest, I’ve chosen the second option, as I like a more technical nest shape. When drawing the chambers, try to use a very dark and visible pencil; it will make the engraving phase a lot easier.
Don’t forget the hydration chamber! For this nest, I decided to place it at the top to facilitate the watering process.
Next step. Engraving.
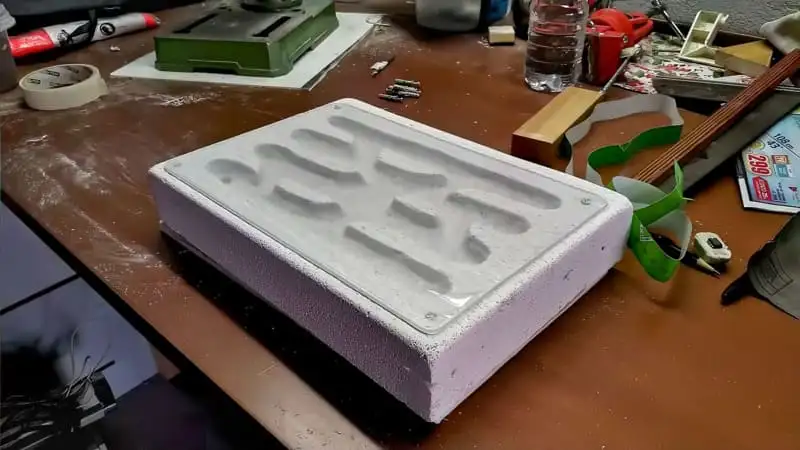
Engraving
Now we can create the chambers of the nest. For this job, you can use a Dremel, like the one I am using, or a simple screwdriver.
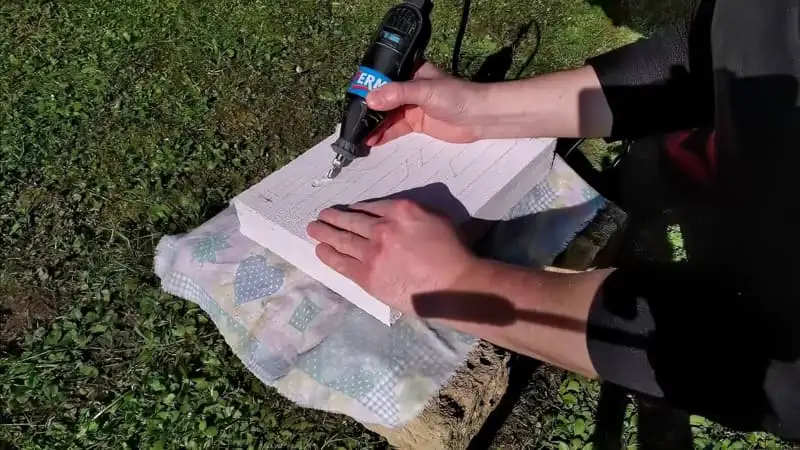
I suggest you wear a mask during this phase, as Ytong produces a lot of dust.
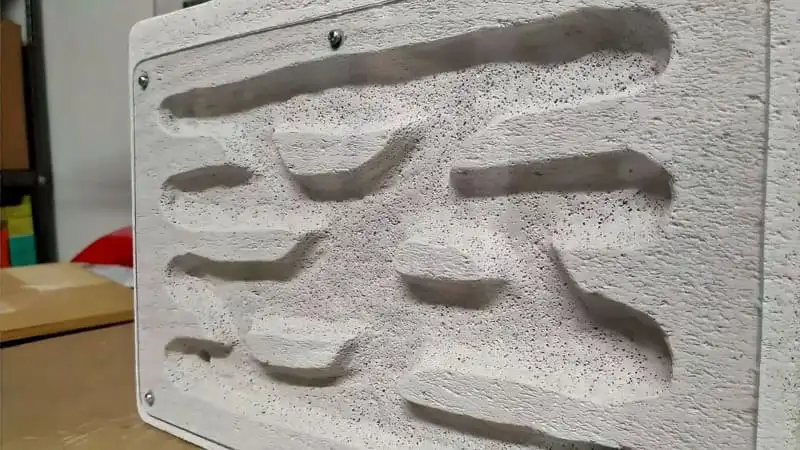
Not bad!

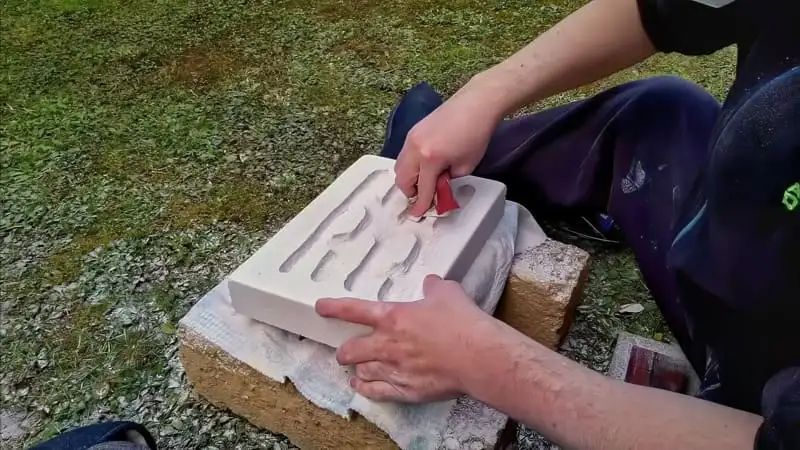
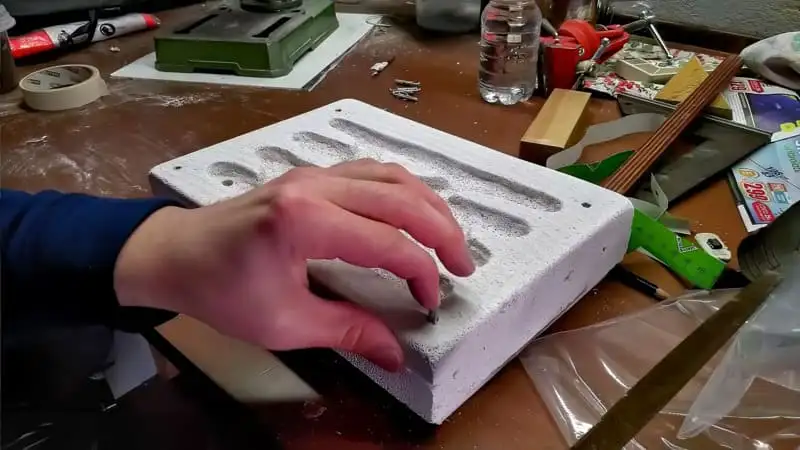
When finished, we can clean the little imperfections by using some sandpaper and a piece of wood. Keep in mind that Ytong is a very soft material, so you don’t have to push too hard when using the piece of sandpaper.
You can also clean the interior of the chambers, making them a little more appealing.
If you are a beginner and have no idea how to get your hands on an ant colony, I would suggest you check out this other guide! In this one, you will learn everything you need to know to catch your very first queen ant, the mother of all members of the colony!
The Front Panel
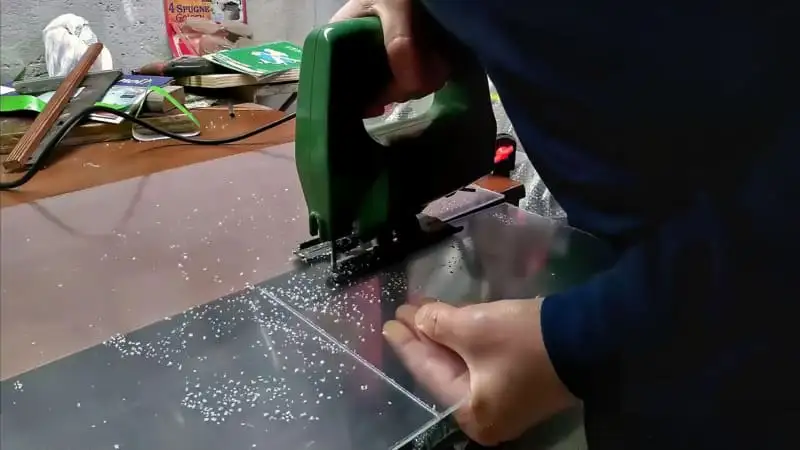
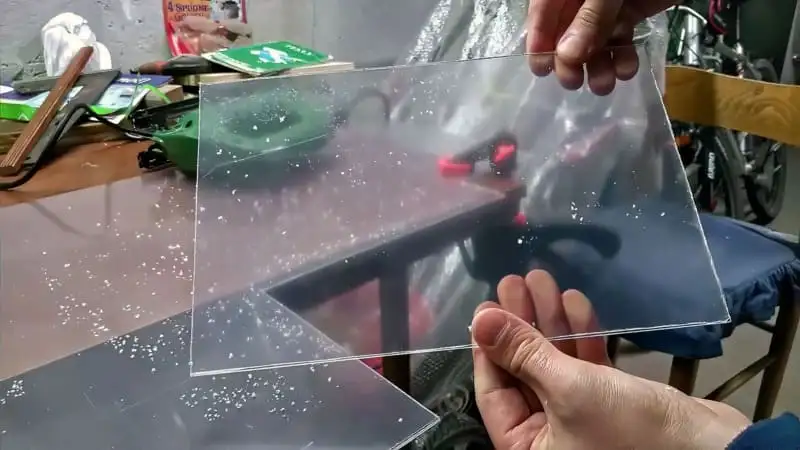
Now we have to make the acrylic front panel. After we’ve taken the needed measurements we can start cutting the piece. For this nest, I am using plexiglass, a very easy-to-find type of transparent plastic.
For cutting the plexiglass, you can use a normal saw for metals or a jigsaw. You can choose which one you prefer the most.
Here’s the panel.
Just like the Ytong, we can remove the little imperfections by using some sandpaper.
Drilling The Holes
To attach the plexiglass panel to the Ytong, we can use some dowels and some screws. By using these, we will be able to remove the panel for cleaning the nest, a step not possible when using silicone.

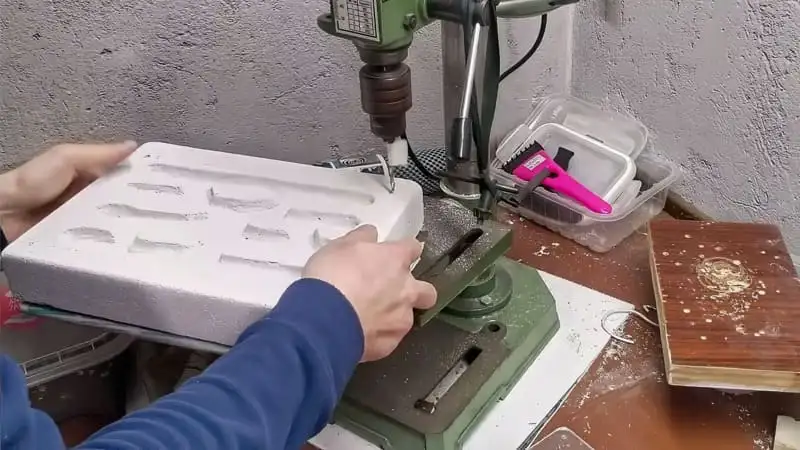
Now we have to drill the holes in the plexiglass panel and in the Ytong block.
Keep in mind that the holes in the plexiglass panel should be slightly smaller than those in the Ytong.
When drilling the Ytong block, push the drill bit very softly. Ytong is a very fragile material, and the last thing we want is to crack our precious new nest while making some holes.
At this stage, you can also drill the entrance hole, from which the ants will enter the nest.
Attaching The Front Panel
Now we can finally remove the protective film from the plexiglass panel! This is always so satisfying!
It looks amazing!
Now we can insert the dowels into the holes of the Ytong block. You can use the back of a tool to push them all the way down.
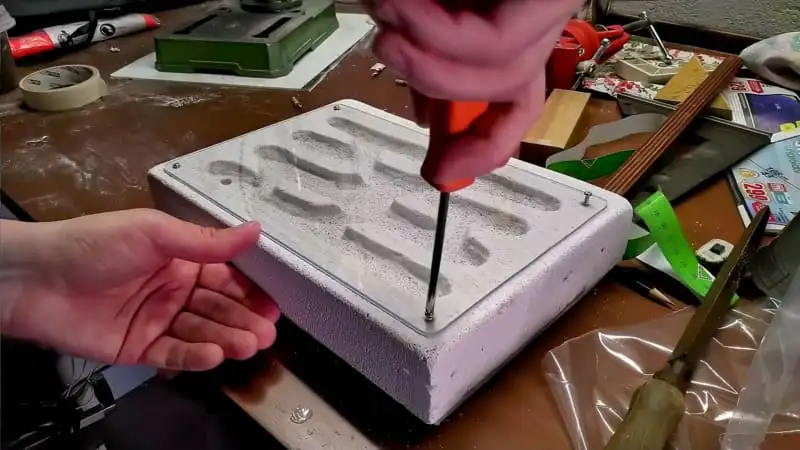
After that, we can attach the transparent panel to the Ytong block. Simply place the plexiglass panel and start screwing in the screws.
Use a screwdriver to complete the job and tighten the screws all the way in.
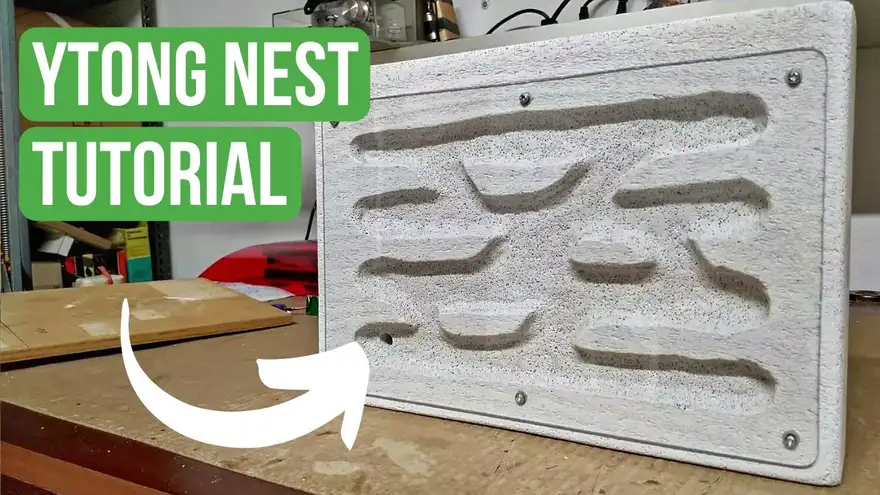
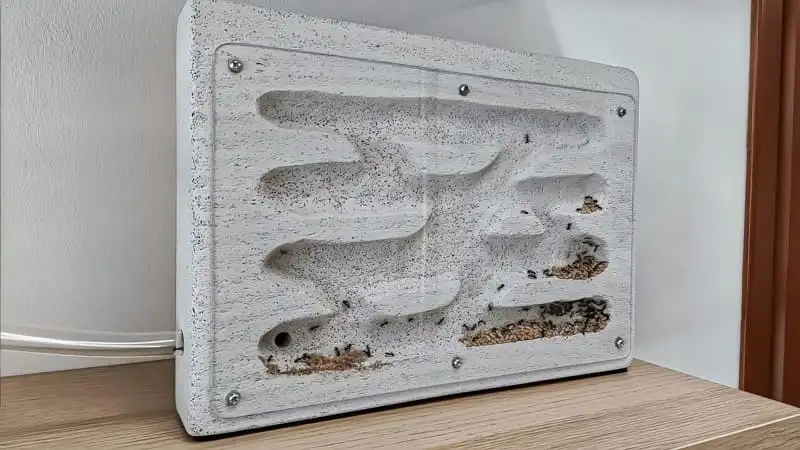
The Final Result!
Here it is! You’ve successfully built a Ytong nest all by yourself!
Now you can move a colony into it! I’m pretty sure they will love it!
I hope you have found this guide helpful!

If you liked this tutorial and love making DIY projects, I would strongly suggest you check out this other tutorial!. In this one, you will learn how to build a very cool tube spiral for connecting your ant nest to an outworld!
FAQs
Ytong is a type of aerated concrete that is popular in ant keeping for its moisture retention properties and ease of sculpting.
You can find Ytong at most hardware stores or order it online from ant keeping shops.
You will need a wood saw, a Dremel or screwdriver, sandpaper, and cutting tools for plexiglass.
Yes, you should drill holes in the Ytong block for ventilation and to attach the plexiglass front panel.
Ytong is ideal for many humidity-loving ant species, making it a great choice for beginner ant keepers.

Author